How We Instantly Start Minecraft Servers
Discover what milestone we recently achieved in the Chunk Explorer project and how we are able to efficiently start Minecraft servers.
Chunk Explorer: First Milestone Reached
In this post, I want to give an overview of the current state of the Chunk Explorer, what milestone we recently achieved, and how we are able to start Minecraft servers within seconds. This will be a mostly technical post, so if you're interested in the dirty details, stick around! But, before I dig deeper, I will give you a short introduction to what the Chunk Explorer will be.
Introduction
With Chunk Explorer we want to create a platform where everyone can publish their Minecraft creations for others to play or just for you and your friends. You will be able to easily run your own Minecraft server, install the plugins you want, and let others play your Chunk. The Chunk Explorer will be offered as a free service with reasonable limits for each user.
We have a clear set of goals defined:
- Easy and straightforward experience to play Chunks.
- Provide a smooth workflow for developers to publish their creations.
- Efficiently host Minecraft servers. This allows us to create a free offer due to minimized costs.
Currently, the focus is only on minigames or, in more generic terms, stateless experiences — meaning things that don't require world changes to be persisted across server restarts. For example, a typical BedWars plugin will provide a fresh map on every server start, and you usually don’t expect to encounter previously placed blocks in the next round, so not storing any world state is okay. On the other hand, a survival server without persistent world changes is not really fun to play on. Supporting server persistence is currently not in scope for the initial release, but don't worry — it is definitely a feature that will be implemented at a later date.
A few days ago, we hit our first important development milestone: restoring a checkpoint with full network connectivity on a node (our term for servers hosting your Chunks) is now possible and is working as expected. This is exciting because, with this out of the way, the most time-consuming work has been completed.
Requirements and Architecture
This is the part where we dive a bit deeper into how the node implementation currently works. So, if you’re not interested in technical details, you might want to stop reading now. Great! Now that I have 100% reader retention, we’re good to go.
Let’s start with something obvious: to be able to start Minecraft servers, we need a host running software that manages the entire lifecycle of a Minecraft server. But we also want to start them as efficient as possible. This is why we utilize a technology called checkpointing. Essentially, this allows us to start servers instantly and without a significant performance hit compared to a normal startup. I will revisit this later and explain it in detail.
Connection to the Internet is also crucial. Otherwise, plugins relying on an external database, for example, will not work, which would be a big limitation.
So let’s sum up the all requirements:
- Have some software exposing an API to manage a servers lifecycle
- Use container checkpointing to enable efficient server startup
- Servers need to be able to reach the Internet
To accomplish all of this, there are several components in play. Let me briefly explain what they do and what their purpose is.
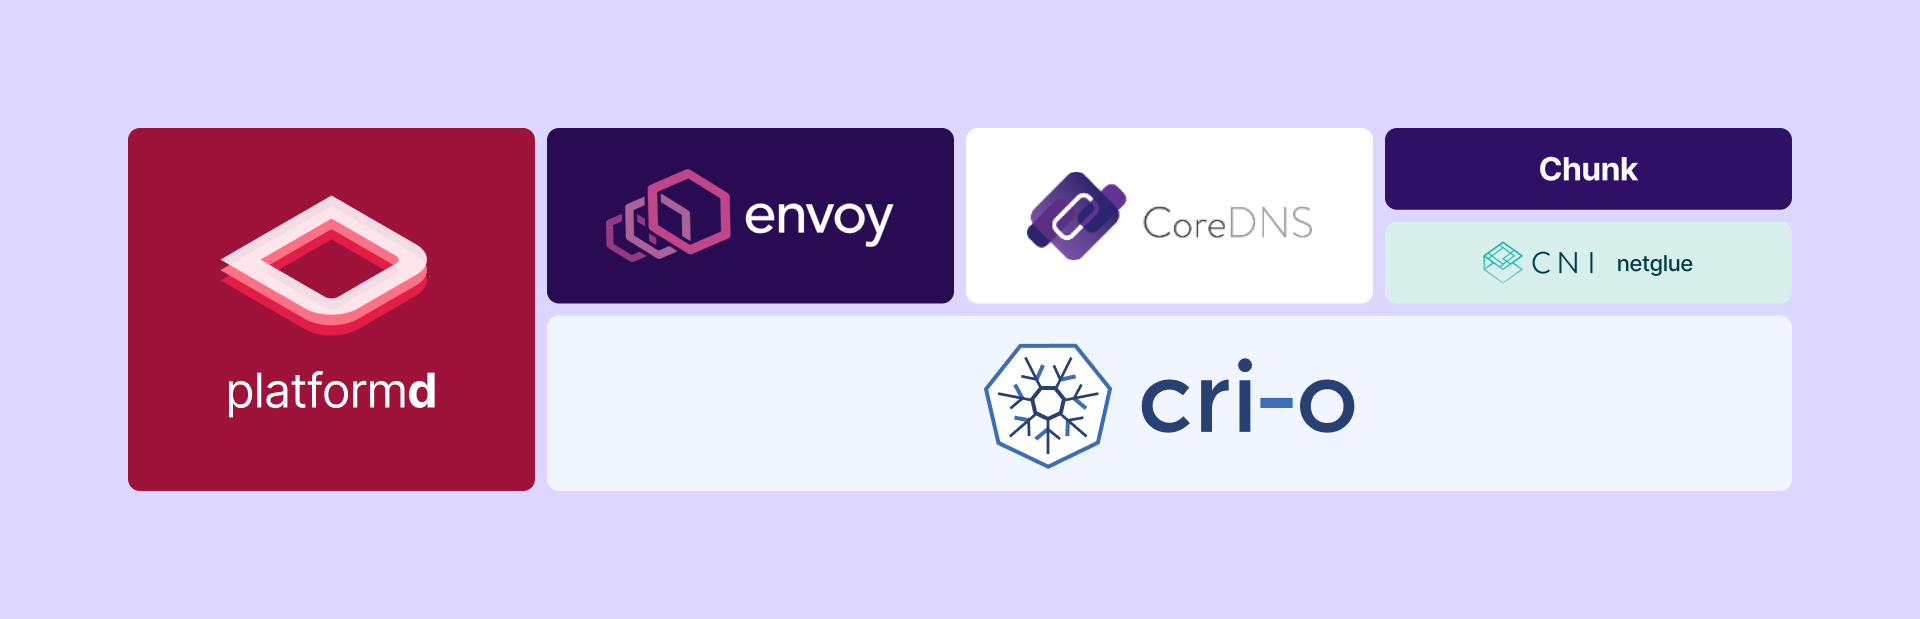
CRI-O: A container runtime capable of creating and restoring container checkpoints. Container runtimes provide an API called CRI to create containers and Pods (a group of containers sharing specific resources).
Envoy: A transparent proxy managing traffic originating in the container itself, e.g. plugins querying a Database or other external APIs. Transparent in this case means programs won’t notice that network traffic is being proxied.
CoreDNS: DNS server running on the node handling all DNS requests of workloads.
netglue: A so-called CNI (Container Network Interface), which is basically a fancy name for a plugin that is used to configure all kinds of stuff related to networking inside a container. In our case it is responsible for making sure packets destined to the Minecraft server inside the container are received and also sent back to the client. It enables internet access for other software running alongside the Minecraft server, such as plugins making a request to some service.
Chunk: A running Minecraft server.
platformd: The management component handling the lifecycle of servers as well as acting as a configuration source for Envoy
A Word on Checkpointing
Now that you have an overview of all the components in play, I want to tell you a bit about checkpointing — what it is and why it’s so useful in a Minecraft server use case.
As you might know, since 1.13 the startup cost of a Spigot/Paper server has increased substantially, making it practically impossible to deploy them to small, less powerful hosts like cloud servers. This is where checkpointing containers will play a crucial role. Checkpointing enables us to basically reduce the startup cost down to almost 0. Checkpointing a container will create files on disk that contain the containers memory at the time of checkpointing. These files can later be used to restore the container to the exact state it was in when the checkpoint has been taken.

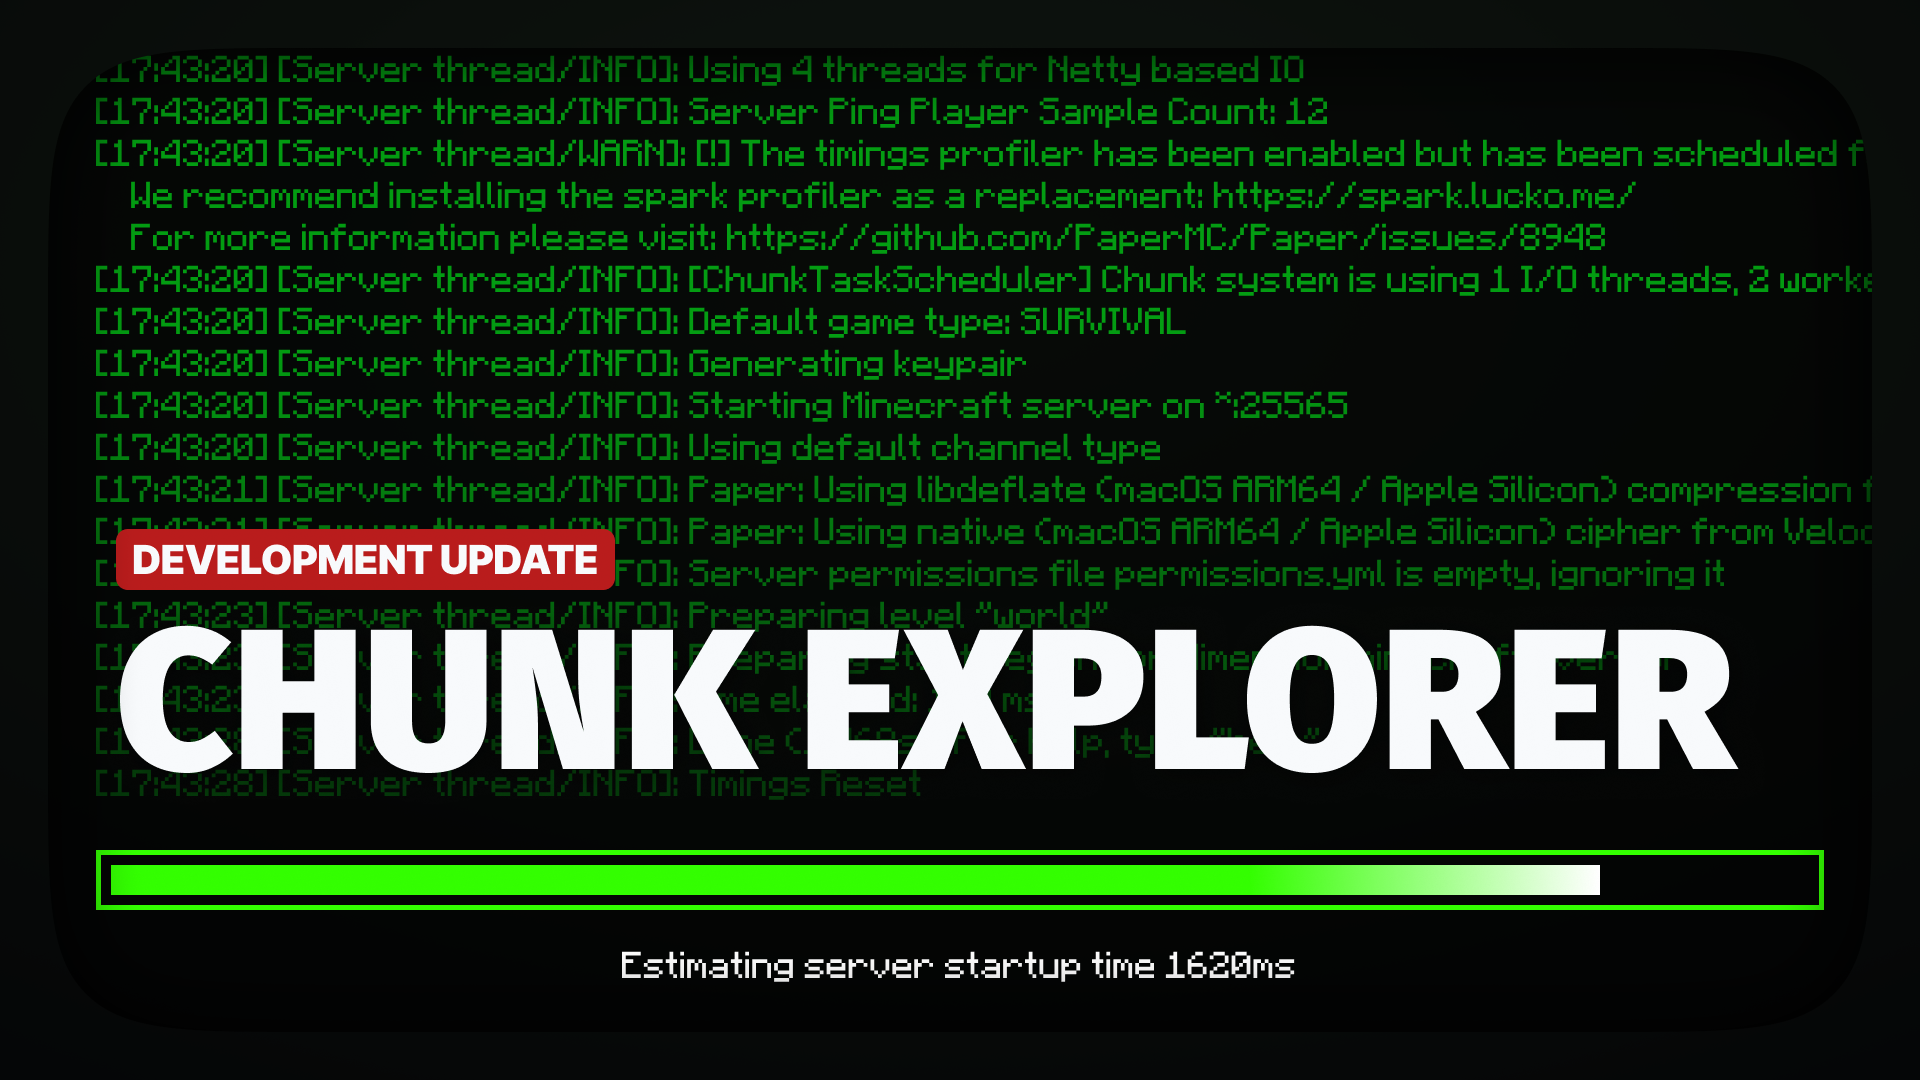
With this technology it is possible to create Minecraft servers, without having the significant startup cost, given a checkpoint was created after the server has been initialized. This means that once we have a checkpoint, subsequent server starts will be very efficient even on limited hosts, because the load after server initialization is rather low. As you can see in the above GIF, starting a server on an Hetzner Cloud CAX21 instance only takes seconds and a fraction of CPU usage.
The whole magic of creating and restoring a checkpoint of a container is already implemented by the container runtime we are going to use, which is CRI-O.
How Components Are Interacting
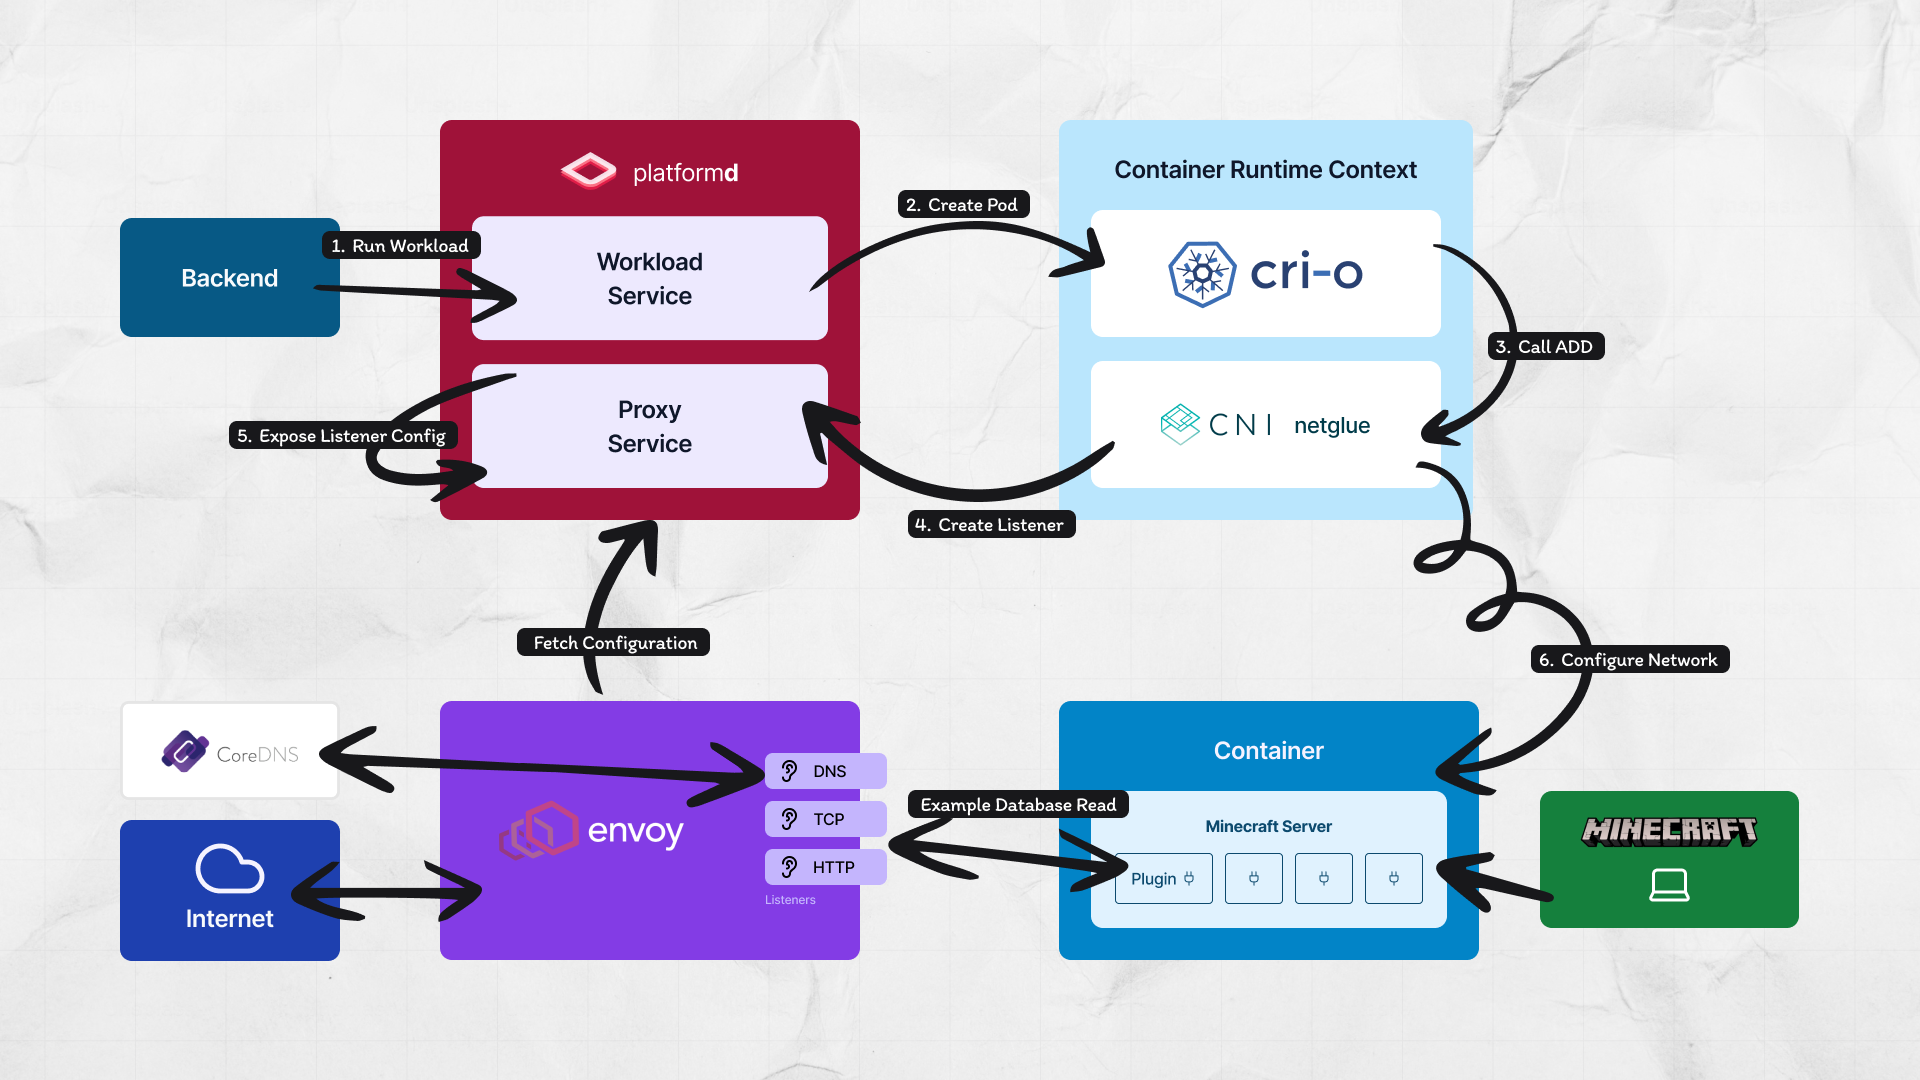
Explaining all interactions in detail would be waaaay out of scope for this blog post, but nevertheless I want to give you a little insight of what’s happening in the grand scheme of things. This is why I created this (hopefully) understandable picture of all interactions.
Looking Forward
After the first big milestone has been accomplished, there is still much to do. The first thing will be cleaning up all the ugly code that accumulated over multiple debugging sessions. Also there are a bunch of tests missing, so those need to be written as well.
When the current codebase is all cleaned up and shiny, we have to implement deletion of all network related resources once a server is deleted. Another thing is Port forwarding. This needs to be properly implemented, so that we can define a range of ports where Minecraft servers will be reachable from the outside.
The next bigger piece of software we need to build is a backend, that is responsible for distributing chunks across multiple platformd instances. Since we want to integrate the Chunk Explorer in our player queueing system, this phase of development will most likely feature an open-match integration.
If you want to keep up with development or ask questions feel free to head over to the GitHub repo and open an issue or visit our Discord.
All Articles from the Universe
 Chunk Explorer: A First Introduction
Get to know the Chunk Explorers basics and how to publish your own content on our platform.
DevelopmentMay 5, 20254min- How We Instantly Start Minecraft Servers
Discover what milestone we recently achieved in the Chunk Explorer project and how we are able to efficiently start Minecraft servers.
DevelopmentJanuary 14, 20255min  Game Cup Season 1: Behind the Scenes
Explore behind-the-scenes insights from Game Cup Season 1! Learn about challenges, improvements, and exciting plans for Season 2.
Behind The ScenesDecember 8, 20246min